Showing posts with label Tutorial Blogspot. Show all posts

Monday, September 17, 2012

Cara Membuat Random Post Scroll

Cara Membuat Random Post Scroll - Selamat Malam sahabat himpunan panduan serta trick seluruh sesudah absen sekian hari tidak berikan menulis pada malam hari ini saya akan berikan langkah bikin random post scroll. apasih sesungguhnya random post, random post itu yaitu pemberian info dengan acak dari situs (blog) kita pada beberapa pengunjung. buat bikin random post scroll kita cuma mengubah sedikit script darirandom post yang kita punyai. buat lebih jelas marilah beberapa sahabat seluruh ikutilangkah-langkah langkah bikin random post scroll di bawah ini.

Pertama sahabat pastinya mesti login terlebih dulu di blogger
Kedua silahkan sahabat tentukan rancangan = ubah html
janganlah lupa centang expand template widget
lantas sahabat mencari

<b:widget id='HTML9' locked='false' title='Random Post' type='HTML'> <b:includable id='main'>   <!-- only display title if it's non-empty -->   <b:if cond='data:title != &quot;&quot;'>     <h2 class='title'><data:title/></h2>   </b:if> <div style='margin:0; padding:10px;height:150px;overflow:auto;border:1px solid #ccc;'>   <div class='widget-content'>     <data:content/>   </div></div> </b:includable> </b:widget>
  1. Sisipkan Kode yang berwarna Merah
  2. Kemudian Klik SAVE
Semoga Informasi dari Kumpulan Tips dan Trik tentang Cara Membuat Random Post Scroll berguna dan bermanfaat untuk sobat semua.

Saturday, December 31, 2011

The Slider Automatically For Online Store Templates

I have a friend who is asking to be made via email an automatic slider for the online store dikelolanya. Business selling goods or services by making use of internet facilities now again ngetrend, and request to make a template online store, but also a lot of kok susah banget ya? I won't go into it now, I will try to meet the demand by creating a Featured Slider is simple with the addition of paginated incomprehensible thumbnail under summary or summary of the article. The principle of work of this slider is similar to the slider on the template Johny Confused, here is my only modification background and add a logo at the bottom of the image of shopping center.


slider toko online

DEMO

Well get on with it in the way of its production:

The first step
  1. We should make a widget below the header to put the slider later. Login to blogger with your account
  2. After signing in to the dashboard, select blogs that want to set a slider.
  3. Then select the template >> Edit the HTM, don't forget the check first box expand widget templates.
  4. Backup first just in case if template error occurred in later edits. Then insert the following code above ]] > </b:skin>
    view plainprint?
    1. /* Slide Content 
    2. ----------------------------------------------- */  
    3. slide-wrapper {.padding:0 auto;margin:0 auto;width:auto;float: left;  
    4. word-wrap: break-word; overflow: hidden;}   
    5. . slide {color: # 666666;line-height: 1.3 em;}  
    6. slide ul {...list-style:none;margin:0 0 0;padding:0 0 0;}  
    7. slide li {.margin:0;padding-top:0;  
    8. padding-right:0;padding-bottom:.25em;  
    9. padding-left:0px;text-indent:0px;line-height:1.3 em;}  
    10. slide {widget..margin:0px 0px 6px 0px;}  
  5. Then to call the widget that appears in layout, place the following code in the < div id = ' main-wrapper ' >
    view plainprint?
    1. < b:if = cond' the data: url = blog. = data: homepageUrl ' blog.>  
    2. < div id =' slide-wrapper '>  
    3. < b:section class =' slide show ' id =' slide ' preferred =' yes '/>  
    4. </div>
    5. </b:if>
  6. Then save the template, now you get into a layout first, see what is on the bottom of the header, there is one empty widget like in the picture below?

If You are already on the template, there is one empty column lies underneath the header like the image above, the first step is to leave it, directly on the second step

The second step
  1. Still in a position to Edit HTML code below input above ]] > </b:skin>
    . shadow {width:950px; height: 39px; background: # 9a315a72b7a608febd4b756a82f413e1042a269e74867f03a3c90f87786b29ae65538058991
    fb6234653d34dd921d5932c7c704d51cb53efa001de92b84352b22a0ea90eb65fa941ec90d9
    3d29f4e07c3d3b93e7972dca8b0d3930c0d24e483ecbab135567ceb713235dd1f582b8a9ec
    7758d05be90634092eb986211876ee43e26d405fcf5fe83bdece54dc364a32a2c53fab5e727
    34b9a3ad7683acb4bbbf3d360e68b4a60c7a7125c5fd6256be7cb8e1de738609c5f89b4c10
    7e20797eeee0d71dd98fab0466ee783a41a47c1f3827f81900b4285feb1447b5e12e9156394
    efa07f558a5f08ca34d6bd2615c7baacf6257a4f7f7460e569ae9155e90dda83bb0f32bbe6fac5
    ff1ed5652cc48a449b4579c9a34ee3ec7b5032b3774ec11ec4173cbdc103346580074445031
    dc74224316839c86b190400735d261c64c5975a449c297b4f317695efc22dc9a7182a78ff4b3
    2487999f689581769a63c0ab0256b288c8649ad0819d3320838507f0bbc20a24c0ad231fcb1
    76ad068542489e07032ce154375992b818b773e576f6fb4f7d9732ca3097d16fd683d0125d20
    76384fdf8c39e26769d144bb04b08bfce77ae03009e41f6bd8b2ee321846ab47b17194868f8e
    ea525d4228a46ed508916ac67ed0c59ee028161e607a161e61a0 url (https://blogger.googleusercontent.com/img/b/R29vZ2xl/AVvXsEgWJgkQgsMzxmqzQa6eHLAsEWxC_5nWGoiphpaoTFNhEGL7xqQCPTiZbqnAMoQgFyC_mPyCdd2P5odSIOubrqK2f4wBABaR1FKJSdng1HUkDkWGRzSpUe401xgvNObdv_i4AFxLgxsjztB2/s1600/shadow1.png) no-repeat center; margin: 0 auto}
    # featured slider {position: relative; overflow: hidden; width:950px; height:325px; background: # fcfcfc url (https://blogger.googleusercontent.com/img/b/R29vZ2xl/AVvXsEhywWl9mODlXdKGH1e7gtZ2lgiYxKXNvZnIg3QuDlJfbp1tfz-OELfuuWGkoGkdzOBDoe_I6w5qld7bsD9ZAch-Hq4C6yM8prn8NX-RnkykfToVo2kZBObA_110CAZ-CtRm8Ufl77wq4ZR1/s1600/slider-bg.png) repeat-x top; margin: 0 auto; padding: 0 auto}
    #featured-slider .contentdiv{visibility:hidden;position:absolute;left:20px;top:10px;z-index:1;width:305px}
    #featured-slider .contentdiv img{background:#fff;padding:2px;border:1px solid #ccc;width:297px;height:297px;overflow:hidden}
    #featured-slider .sliderPostPhoto{position:relative;height:305px;width:305px;overflow:hidden}
    #featured-slider .sliderPostInfo{position:absolute;top:0;left:345px;color:#a1a1a1;background:url();height:190px;
    width:540px;padding:5px 0 0}
    #featured-slider .sliderPostInfo p{color:#0a0a0a;line-height:1.6em;font-size:14px;padding-top:1px}
    #featured-slider .featuredPostMeta a{color:#a1a1a1}
    #featured-slider .order a {display:block; width:98px; height:40px; bottom:14px; left:0px;background:url(https://blogger.googleusercontent.com/img/b/R29vZ2xl/AVvXsEjWzwH_Us4M7_otQB9oRT1D-NtEwIrtXnGx1a2mFke9eV-8IMkKbfOSjuARX2H3h1We2yipMTc_v7W0KlBNbS_i-ldf3_YWOxUjiEy1706Lq6B5aPJuMBHy2jicPAQ5vIwFCiW4XuH7xAEV/s1600/order.png) no-repeat 0 0; position:absolute; font-size:15px; line-height:13px; text-transform:uppercase; text-decoration:none; font-family: 'Open Sans', sans-serif; color:#fff; font-weight:700; padding:11px 0 0 6px;}
    #featured-slider .order a:hover{ color:#515151;}
    .featuredTitle{font:bold 24px Tahoma;color:#719429;line-height:1cm}
    .featuredTitle a{color:#719429}
    .featuredTitle a:hover{color:#0a0a0a}
    #paginate-featured-slider{position:absolute;right:0;top:250px;z-index:1;width:595px;height:80px;overflow:hidden}
    #paginate-featured-slider ul{width:595px;list-style:none}
    #paginate-featured-slider .featured_thumb{float:left;margin-right:15px;width:65px;height:65px;padding:0}
    #paginate-featured-slider .featured_thumb:hover{opacity:0.7}
    Ukuran 950px diatas menunjukkan lebar slider, dan 325px adalah tinggi slider. Silahkan sesuaikan dengan ukuran template Anda.
  2. Setelah langkah diatas, masukkan kode berikut diatas kode </head>
    <script src='http://ajax.googleapis.com/ajax/libs/jquery/1.7.2/jquery.min.js' type='text/javascript'/>
    <script src='https://masolis-javascript.googlecode.com/svn/trunk/slider.js' type='text/javascript'/>
    <script type='text/javascript'>
    //<![CDATA[
    imgr = new Array();
    imgr[0] = "https://blogger.googleusercontent.com/img/b/R29vZ2xl/AVvXsEhOrY7GGrFKMuSnnpoMrbu8dU8I_V0kExL-LsKta6GeluJV1dZjO8BNM6Wuquhd6tesw5jPwdVNIw_LPJByUCvBi2zoYyR5q7eP43JkoCSpk3Efik4oBld1x1iqhhHCiu7Gh-EauHlXis8/s1600/no+image.jpg";
    showRandomImg = true;

    aBold = true;

    summaryPost = 400;
    summaryTitle = 25;

    numposts2 = 7;

    function removeHtmlTag(strx,chop){
    var s = strx.split("<");
    for(var i=0;i<s.length;i++){
    if(s[i].indexOf(">")!=-1){
    s[i] = s[i].substring(s[i].indexOf(">")+1,s[i].length);
    }
    }

    s = s.join("");
    s = s.substring(0,chop-1);
    return s;
    }

    function showrecentposts1(json) {
    j = (showRandomImg) ? Math.floor((imgr.length+1)*Math.random()) : 0;
    img = new Array();
     
      for (var i = 0; i < numposts2 ; i++) {
        var entry = json.feed.entry[i];
        var posttitle = entry.title.$t;
    var pcm;
        var posturl;
        if (i == json.feed.entry.length) break;
        for (var k = 0; k < entry.link.length; k++) {
          if (entry.link[k].rel == 'alternate') {
            posturl = entry.link[k].href;
            break;
          }
        }

    for (var k = 0; k < entry.link.length; k++) {
          if (entry.link[k].rel == 'replies' && entry.link[k].type == 'text/html') {
            pcm = entry.link[k].title.split(" ")[0];
            break;
          }
        }

        if ("content" in entry) {
          var postcontent = entry.content.$t;}
        else
        if ("summary" in entry) {
          var postcontent = entry.summary.$t;}
        else var postcontent = "";
       
        postdate = entry.published.$t;

    if(j>imgr.length-1) j=0;
    img[i] = imgr[j];

    s = postcontent ; a = s.indexOf("<img"); b = s.indexOf("src=\"",a); c = s.indexOf("\"",b+5); d = s.substr(b+5,c-b-5);

    if((a!=-1)&&(b!=-1)&&(c!=-1)&&(d!="")) img[i] = d;

    //cmtext = (text != 'no') ? '<i><font color="'+acolor+'">('+pcm+' '+text+')</font></i>' : '';


    var month = [1,2,3,4,5,6,7,8,9,10,11,12];
    var month2 = ["Jan","Feb","Mar","Apr","May","Jun","Jul","Aug","Sep","Oct","Nov","Dec"];

    var day = postdate.split("-")[2].substring(0,2);
    var m = postdate.split("-")[1];
    var y = postdate.split("-")[0];

    for(var u2=0;u2<month.length;u2++){
    if(parseInt(m)==month[u2]) {
    m = month2[u2] ; break;
    }
    }

    var daystr = day+ ' ' + m + ' ' + y ;

    var trtd = '<div class="contentdiv"><div class="sliderPostPhoto"><a class="crop-foto" href="'+posturl+'"><img width="200" height="150" class="alignright" src="'+img[i]+'"/></a></div><div class="sliderPostInfo"><div class="featuredTitle"><a href="'+posturl+'">'+posttitle+'</a></div><span class="featuredPostMeta">'+daystr+' | <a href="'+posturl+'">'+pcm+' Comments</a></span><p>'+removeHtmlTag(postcontent,summaryPost)+'... <a href="'+posturl+'" class="meta-more">View Detail </a></p></div><p class="order"><a href="'+posturl+'">order!</a></p></div>';
    document.write(trtd);

    j++;
    }

    }

    function showrecentposts2(json) {
    j = (showRandomImg) ? Math.floor((imgr.length+1)*Math.random()) : 0;
    img = new Array();
     
      for (var i = 0; i < numposts2 ; i++) {
        var entry = json.feed.entry[i];
        var posttitle = entry.title.$t;
    var pcm;
        var posturl;
        if (i == json.feed.entry.length) break;
        for (var k = 0; k < entry.link.length; k++) {
          if (entry.link[k].rel == 'alternate') {
            posturl = entry.link[k].href;
            break;
          }
        }

    for (var k = 0; k < entry.link.length; k++) {
          if (entry.link[k].rel == 'replies' && entry.link[k].type == 'text/html') {
            pcm = entry.link[k].title.split(" ")[0];
            break;
          }
        }

        if ("content" in entry) {
          var postcontent = entry.content.$t;}
        else
        if ("summary" in entry) {
          var postcontent = entry.summary.$t;}
        else var postcontent = "";
       
        postdate = entry. published. $ t;

    if (j > imgr. length-1) j = 0;
    img [i] = imgr [j];

    s = postcontent ; a = s. indexOf ("< img"); b = s. indexOf ("src =" \ ", a); c = s. indexOf ("\" + 5 ", b); d = s. substr (b + 5, c-b-5);

    if ((a! =-1) & & (b! =-1) & & (c! =-1) & & (d! = "")) img [i] = d;

    //cmtext = (text! = ' no ')? ' <i> < font color = "' + acolor + '" > (pcm + ' ' + ' + text + ') ' </font></i> ': ';


    var month = [1, 2, 3, 4, 5, 6, 7, 8, 9, 10, 11, 12];
    var month2 = ["Jan", "Feb", "Mar", "Apr", "May", "Jun", "Jul", "Aug", "Sep", "Oct", "Nov", "Dec"];

    var day = postdate. split ("–") [2]. substring (0.2);
    var m = postdate. split ("–") [1];
    var y = postdate. split ("–") [0];

    for (var u2 = 0; u2 < month. length; u2 ++) {
    if (parseInt (m) == month [u2]) {
    m = month2 [u2]; break;
    }
    }

    var daystr = day + ' ' + ' ' + m + y;

    var trtd = ' < ul class = "featured_thumb" >< a rel = "' + i + '" class = "toc" href = "#" >< img width = "66" height = "65" title = "our product" alt = "our product" class = "featured_thumb" src = "' + img [i] + '" >/</a></ul> ';
    document.write (trtd);

    j++;
    }

    }
    //]]>
    </script>
    Take note of the color code Red above if your template already exists at jQuery.min.js though different series, you don't need to include the script color Red again. Pretty one jQuery min for one template. If there are two, are likely to clash and slidernya no way.
  3. The next note on the script code is the first step to number 5 above, replace all the code below:
    <b:if cond='data:blog.url == data:blog.homepageUrl'>
    <div id='slide-wrapper'>
    <b:section class='slide' id='slide' preferred='yes'>
    <b:widget id='HTML82' locked='false' title='feature content slider' type='HTML'>
    <b:includable id='main'>
    <div id='featured-slider'>
    <script>
    document.write(&quot;&lt;script src=\&quot;/feeds/posts/default/-/<data:content/>?max-results=&quot;+numposts2+&quot;&amp;orderby=published&amp;alt=json-in-script&amp;callback=showrecentposts1\&quot;&gt;&lt;\/script&gt;&quot;);
    </script>
    <div id='paginate-featured-slider'>
    <ul>
    <script>
    document.write(&quot;&lt;script src=\&quot;/feeds/posts/default/-/<data:content/>?max-results=&quot;+numposts2+&quot;&amp;orderby=published&amp;alt=json-in-script&amp;callback=showrecentposts2\&quot;&gt;&lt;\/script&gt;&quot;);
    </script>
    </ul>
    </div>
    </div>
    <script type='text/javascript'>
    featuredcontentslider.init({
    id: &quot;featured-slider&quot;, //id of main slider DIV
    contentsource: [&quot;inline&quot;, &quot;&quot;], //Valid values: [&quot;inline&quot;, &quot;&quot;] or [&quot;ajax&quot;, &quot;path_to_file&quot;]
    toc: & quot; & quot; markup,//Valid values: & quot; # increment & quot;, & quot; the markup & quot;, [& quot; and & quot; label1, label2 & quot; & quot;, etc]
    nextprev: [& quot; & quot;, & quot; and & quot;],//labels for & quot; prev & quot; and & quot; next & quot; links. Set to & quot; & quot; to hide.
    revealtype: click & & quot; quot;,//Behavior of the pagination links to reveal the slides: & quot; click & quot; or & quot; and & quot; mouseover
    enablefade: [true, 0.2],//[true/false, fadedegree]
    autorotate: [0, 5000],//[true/false, pausetime]
    onChange: function (previndex, curindex)//event handler fired whenever {script changes slide
    //previndex holds index of last slide viewed b4 current (1 = 1st slide, 2nd = 2nd etc)
    //curindex holds index of currently shown slide (1 = 1st slide, 2nd = 2nd etc)
    }
    })
    </script>
    </b:includable>
    </b:widget>
    </b:section>
    </div>
    </b:if>
    < div class = ' shadow '/>
  4. After that save the template and into the layout will look like in the picture below:


  5. Then click Edit on the widget featured content slider, after a new window open insert or type a label that would like to display on the slider, see figure below:


    From the picture above I put Electronic label that will appear on the slider, you can replace the appropriate desires.
  6. Last save, and look at the blog You've plugged attract slider.
First Yes make much for tutorial featured slider simple to shop online, sorry if my writing desultory because more sad, certainly among the many friends who follow the news in the media a lot of victims who have not found due to the fall of the Sukhoi aircraft, although none of my family who participated in the flight, but I am concerned with the number of occurrences of the aircraft crashed in the country, why don't ya? Beside that, I am also sad today my Adsense got banned ... lebay banget somprettt duuhhh. If there is still a lack of clarity in the explanation above, leave a message in the comment box. Good luck and hopefully useful

Tuesday, December 20, 2011

Popular modifications to the Template Gallery Post

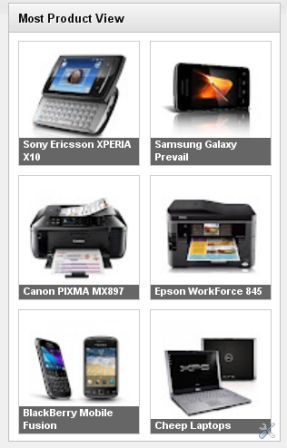
Exspost Blog - I will be viewing one by one feature on the demo template before I'll share, so hopefully You can create templates or create your own with the modification of the default widgets that are already provided by blogger. Widgets from my blogger modification times are Popular Post, a widget that functions to display the posting or article where the most interest its visitors. By default the widget is already attracting a Popular Post because there is already a feature of the thumbnail and summary. But in my opinion it's conditional, it can be directly installed widget on his blog that more use of article rather than an image, if the default widgets that are installed on a blog-like gallery seemed less suitable.


popular

DEMO

Well, this time I am trying to modify those widgets to fit is mounted on a blog that has content gallery. Picture as above, only showing thumbnails and title to the horizontal position. If you're interested, here's how to make it:
  1. Login to your account with Blogger
  2. After that go to >> click on template Edit HTML do not forget to tick the Expand Widget Templates.
  3. Then enter the following code above ]] > </b:skin> :
    .PopularPosts. widget-content ul li {background: none repeat scroll 0 0 transparent; float: left; list-style: none outside none; margin: 0!important; padding: 0! important; border-bottom: none}
    .PopularPosts ul {padding: 0 5px}
    .-Item thumbnails PopularPosts. img {width:110px; height:110px; padding: an 11px; margin: 0}
    .PopularPosts. item-content {position: relative; float: left; margin: 0}
    .PopularPosts. item-title a {font-size: an 11px; color: # f f; display: block; padding: 0 5px; float: left; width: 122px}
    .PopularPosts. item-title: hover {opacity: 1;-moz-opacity: 0; filter: alpha (opacity = 100)}
    .-Item thumbnails PopularPosts. {float: left; margin: 3px 7px 10px "1px"; border: solid # ccc; "1px" overflow: hidden}
    .PopularPosts. item-title {background: # 000; position: absolute; bottom: 8px; right: 2px; opacity:. 8;-moz-opacity:. 8; filter: alpha (opacity = 6)}
    Color code Red above is the length and width of thumbnail images, you can change and customize your sidebar width in the template, as shown in the sidebar of this blog.
  4. Then go to layout >> add a gadget select Popular Post on the fifth line.
  5. After the page appears Popular Post, setting as shown below:

    popular

    To note is just the thumbnailcheck box, leave the boxes blank snippet does not need to be checked. The title and the number of post who wants to show up to you.
  6. Following the steps above, go to Edit HTML (tick the Expand Widget Templates), locate the following code:
    < b:widget id = ' PopularPosts1 ' locked = ' false ' title = ' Popular Posts ' type = ' PopularPosts ' >
    < b:includable id = ' main ' >
    < b:if cond = ' data: title ' > <h2><data:title/></h2></b:if>
    < div class = ' widget-content-> popular posts '
    <ul>
    < b:loop values = ' data: ' posts ' post ' var = >
    <li>
    < b:if cond = ' data: showThumbnails == & quot; false & quot; '>
    < b:if cond = ' data: showSnippets == & quot; false & quot; '>
    <!--(1) No snippet/thumbnails-->
    < a href = ' expr: data: post href > <data:post.title/></a>. '
    <b:else/>
    <!--(2) Show only snippets-->
    < div class = ' item-title ' expr: >< a href = ' data: post href > <data:post.title/></a></div>. '
    < div class = ' snippet ' item-> <data:post.snippet/></div>
    </b:if>
    <b:else/>
    < b:if cond = ' data: showSnippets == & quot; false & quot; '>
    <!--(3) Show only thumbnails-->
    < div class = ' item-thumbnails-only ' >
    < b:if cond = ' data: ' thumbnail post. >
    < div class = ' thumbnail ' items->
    < a href = ' expr: data: href ' post. ' target = _blank ' >
    <img alt='' border='0' expr:height='data:thumbnailSize' expr:src='data:post.thumbnail' expr:width='data:thumbnailSize'/>
    </a>
    </div>
    </b:if>
    <div class='item-title'><a expr:href='data:post.href'><data:post.title/></a></div>
    </div>
    <div style='clear: both;'/>
    <b:else/>
    <!-- (4) Show snippets and thumbnails -->
    <div class='item-content'>
    <b:if cond='data:post.thumbnail'>
    <div class='item-thumbnail'>
    <a expr:href='data:post.href' target='_blank'>
    <img alt='' border='0' expr:height='data:thumbnailSize' expr:src='data:post.thumbnail' expr:width='data:thumbnailSize'/>
    </a>
    </div>
    </b:if>
    <div class='item-title'><a expr:href='data:post.href'><data:post.title/></a></div>
    <div class='item-snippet'><data:post.snippet/></div>
    </div>
    <div style='clear: both;'/>
    </b:if>
    </b:if>
    </li>
    </b:loop>
    </ul>
    <b:include name='quickedit'/>
    </div>
    </b:includable>
    </b:widget>
  7. Setelah ketemu, ganti dengan kode berikut ini :
    <b:widget id='PopularPosts1' locked='false' title='Most Product View' type='PopularPosts'>
    <b:includable id='main'>
    <b:if cond='data:title'><h2><data:title/></h2></b:if>
    <div class='widget-content popular-posts'>
    <ul>
    <b:loop values='data:posts' var='post'>
    <li>
    <b:if cond='data:showThumbnails == &quot;false&quot;'>
    <b:if cond='data:showSnippets == &quot;false&quot;'>
    <!-- (1) No snippet/thumbnail -->
    <a expr:href='data:post.href'><data:post.title/></a>
    <b:else/>
    <!-- (2) Show only snippets -->
    <div class='item-title'><a expr:href='data:post.href'><data:post.title/></a></div>
    <div class='item-snippet'><data:post.snippet/></div>
    </b:if>
    <b:else/>
    <b:if cond='data:showSnippets == &quot;false&quot;'>
    <!-- (3) Show only thumbnails -->
    <div class='item-content'>
    <b:if cond='data:post.thumbnail'>
    <div class='item-thumbnail'>
    <a expr:href='data:post.href' target='_blank'>
    <img alt='' border='0' expr:height='data:thumbnailSize' expr:src='data:post.thumbnail' expr:width='data:thumbnailSize'/>
    </a>
    </div>
    </b:if>
    <div class='item-title'><a expr:href='data:post.href'><data:post.title/></a></div>
    </div>
    <div style='clear: both;'/>
    <b:else/>
    <!-- (4) Show snippets and thumbnails -->
    <div class='item-content'>
    <b:if cond='data:post.thumbnail'>
    <div class='item-thumbnail'>
    <a expr:href='data:post.href' target='_blank'>
    < img alt = '' border = ' 0 ' expr: height = ' data: ' expr thumbnailSize: src = ' data: thumbnail post. ' expr: width = ' data: thumbnailSize '/>
    </a>
    </div>
    </b:if>
    < div class = ' item-title ' expr: >< a href = ' data: post href > <data:post.title/></a></div>. '
    < div class = ' snippet ' item-> <data:post.snippet/></div>
    </div>
    < div style = "clear: both; '/>
    </b:if>
    </b:if>
    </li>
    </b:loop>
    </ul>
    < b:include name = ' quickedit '/>
    </div>
    </b:includable>
    </b:widget>
  8. Lastly, save templates see the result.
Popular Post widget modifications of this blogger not only for blog gallery, you could also wear it on a blog is not a gallery as seen on the sidebar of this blog. So last display Popular Post tutorial for modifying the template Gallery if there is do not understand please feel free to leave a message in the comment box sorry if there is already a tutorial like this before, good luck and hopefully useful

Wednesday, December 7, 2011

Make Automatic Carousel Slider Version 2

Actually been a long time ago I was asked by a blogger friend Ronny Dee to make slider tutorial like Carousel on template Mas Paper 2. This time I will make a tutorial but just wear a simple carousel slider I've ever created in the previous tutorial, here I am just modifying the CSS code, so it looks its just similar to the Carousel slider template Mas Paper 2. But if viewed at a glance, it is precisely this slider is more akin to the existing Carousel slider at the top (bottom navigation) front page site detik.com.

slider carousel

DEMO

How to make it similar to the Automatic Carousel slider version 1, here I simply change the CSS code and adding timestamp above the title of the post. Just below the steps to make it:
  1. First you must log into your blogger account with You
  2. After that select the blog that you want to add this slider.
  3. Go to template >> Edit HTML, then tick the expand widget templates
  4. Untuk berjaga-jaga jika terjadi kesalahan dalam pengeditan nantinya, sebaiknya backup dulu template anda.
  5. Setelah semua langkah diatas anda lakukan, letakkan kode berikut ini diatas kode ]]></b:skin> :
    #carousel{width:980px;height:125px;border-bottom:1px solid #ccc;position:relative;display:block;background:#5599e6;margin-bottom:8px}
    #carousel h5{color:#555;margin:2px}
    #carousel .container{position:absolute;left:24px;width:960px;height:125px;overflow:hidden}
    #carousel .thumb{float:left;margin-right:5px;}
    #carousel #previous_button{position:absolute;width:24px;height:125px;background:url(https://blogger.googleusercontent.com/img/b/R29vZ2xl/AVvXsEgxW9PB_eMMDGfFndShe0QSUg9DBZBJNVUzy8d4P_quHRFlJqyLSF1huAvfDiecdXYxuJRXNtghgP_TX6aegrLlvwLNErAYl7JPo5qwQZtjdvijq70-UzXXl9tExYJUyJjs8Cu3xXiI16Ba/s1600/previous.png) center;z-index:100;cursor:pointer;}
    #carousel #next_button{position:absolute;right:0;width:24px;height:125px;background:url(https://blogger.googleusercontent.com/img/b/R29vZ2xl/AVvXsEhGmpYPp9r9bKjOMPosRQiLM-EQlIFstG1gKfcsI9VuDuv813AKytSYGojHB7eO-HyEB1kkEG_wp6vfTwHsqCokAD_UxGCiLnssFxJ72W3jb15C49Gw2lVxpBrEbkpd3quKr0z2whQkPCsO/s1600/next.png) center;z-index:100;cursor:pointer;}
    #carousel #next_button:hover,#carousel .thumb:hover,#carousel #previous_button:hover{filter:alpha(opacity=70);opacity:.7}
    #carousel ul{width:100000px;position:relative;margin-top:10px}
    #carousel ul li{background:#ebebeb;display:inline;float:left;text-align:left;font:bold 11px Arial;border:0px solid #ccc;width:212px;height:90px;margin:0 2px 20px 6px;padding:6px}
    #carousel ul li a.slider_title{color:#222;display:block;margin-top:0;padding-top:0}
    # carousel ul li a. slider_title: hover {color: # 1b5d97}
    # carousel a img {display: block; background: # 9a315a72b7a608febd4b756a82f413e1042a269e74867f03a3c90f87786b29ae65538058991fb6234653
    d34dd921d5932c7c704d51cb53efa001de92b84352b22a0ea90eb65fa941ec90d93d29f4e07c3d3b93e7972
    dca8b0d3930c0d24e483ecbab135567ceb713235dd1f582b8a9ec7758d05be90634092eb986211876ee43
    e26d405fcf5fe83bdece54dc364a32a2c53fab5e72734b9a3ad7683acb4bbbf3d360e68b4a60c7a7125c5fd6
    256be7cb8e1de738609c5f89b4c107e20797eeee0d71dd98fab0466ee783a41a47c1f3827f81900b4285feb
    1447b5e12e9156394efa07f558a5f08ca34d6bd2615c7baacf6257a4f7f7460e569ae9155e90dda83bb0f32b
    be6fac5ff1ed5652cc48a449b4579c9a34ee3ec7b5032b3774ec11ec4173cbdc103346580074445031dc742
    24316839c86b190400735d261c64c5975a449c297b4f317695efc22dc9a7182a78ff4b32487999f6895817
    69a63c0ab0256b288c8649ad0819d3320838507f0bbc20a24c0ad231fcb176ad068542489e07032ce1543
    75992b818b773e576f6fb4f7d9732ca3097d16fd683d0125d2076384fdf8c39e26769d144bb04b08bfce77a
    e03009e41f6bd8b2ee321846ab47b17194868f8eea525d4228a46ed508916ac67ed0c59ee028161e607a1
    61e61a0; margin-top: 0}
    Take note of the color code Blue , it is the width and height sliders on the demo I've made, please adjust the size of your template.
  6. The next step is still in a position to Edit HTML, insert the following code above the code </head> :
    < script src = 'http://ajax.googleapis.com/ajax/libs/jquery/1.7.2/jquery.min.js' type = ' text/javascript '/>
    < script src = ' https://masolis-javascript.googlecode.com/svn/trunk/carousellite.js ' type = ' text/javascript '/>

    < script type = ' text/javascript ' >

    //<![CDATA [
    imgr = new array();
    imgr [0] = "https://blogger.googleusercontent.com/img/b/R29vZ2xl/AVvXsEhOrY7GGrFKMuSnnpoMrbu8dU8I_V0kExL-LsKta6GeluJV1dZjO8BNM6Wuquhd6tesw5jPwdVNIw_LPJByUCvBi2zoYyR5q7eP43JkoCSpk3Efik4oBld1x1iqhhHCiu7Gh-EauHlXis8/s1600/no+image.jpg";
    showRandomImg = true;

    aBold = true;


    summaryPost = 140;

    summaryTitle = 25;
    numposts1 = 12;

    function removeHtmlTag (strx, chop) {

    var s = strx. split ("<");
    for (var i = 0; i < s. length; i ++) {
    if (s [i]. indexOf (">")! =-1) {
    s [i] = s [i] substring (s [i]. indexOf (">") +1, s [i]. length);
    }
    }

    s = s. join ("");

    s = s. substring (0, chop-1);
    return s;
    }
    function showrecentposts (json) {
    j = (showRandomImg)? Math.floor ((imgr. length + 1) * Math.random ()): 0;
    img = new array();
    document.write (' <ul> ');
    for (var i = 0; i < numposts1; i ++) {
    var entry = json.feed.entry [i];
    var posttitle = entry. title. $ t;
    var pcm;
    var posturl;
    if (i == json.feed.entry.length) break;
    for (var k = 0; k < entry.link.length; k++) {
    if (entry.link[k].rel == 'alternate') {
    posturl = entry.link[k].href;
    break;
    }
    }

    for (var k = 0; k < entry.link.length; k++) {

    if (entry.link[k].rel == 'replies' && entry.link[k].type == 'text/html') {
    pcm = entry.link[k].title.split(" ")[0];
    break;
    }
    }

    if ("content" in entry) {

    var postcontent = entry.content.$t;}
    else
    if ("summary" in entry) {
    var postcontent = entry.summary.$t;}
    else var postcontent = "";
    postdate = entry.published.$t;
    if(j>imgr.length-1) j=0;
    img[i] = imgr[j];
    s = postcontent ; a = s.indexOf("<img"); b = s.indexOf("src=\"",a); c = s.indexOf("\"",b+5); d = s.substr(b+5,c-b-5);
    if((a!=-1)&&(b!=-1)&&(c!=-1)&&(d!="")) img[i] = d;
    //cmtext = (text != 'no') ? '<i><font color="'+acolor+'">('+pcm+' '+text+')</font></i>' : '';
    var month = [1,2,3,4,5,6,7,8,9,10,11,12];
    var month2 = ["January","February","March","April","May","June","July","August","September",
    "October","November","December"];
    var day = postdate.split("-")[2].substring(0,2);
    var m = postdate.split("-")[1];
    var y = postdate.split("-")[0];
    for(var u2=0;u2<month.length;u2++){
    if(parseInt(m)==month[u2]) {
    m = month2[u2] ; break;
    }
    }

    var daystr = day+ ' ' + m + ' ' + y ;

    var trtd = ' < li class = "car" >< div class = "thumb" >< a href = "' + >< + '" posturl img width = "100" height = "90" class = "alignnone" src = "' + img [i] + '"/> </a></div><h5>'+daystr+'</h5> < a class = "slider_title" href = "' + '" posturl + > ' + </a></li> + ' posttitle ';

    document.write (trtd);

    j++;
    }
    document.write (' </ul> ');
    }
    //]]>
    </script>
    Description:
    Note the URL of the script color Red above, it is the script code jQuery.min.js recent series that I used to create this slider. If You are already on the template, there is aQuery.min.js even though the series is different, the code in red above, You no longer need to enter. Pretty one jQuery.min.js is on the template, it's up to how many series, if you can the latest version.
    Color code Blue : 12 is the amount slider is displayed. While the numbers 100 and 90 is the length and width of the image that is in the slider.
  7. The next step is to call the slider that appears in our blog. Search code < div id = ' main ' wrapper->, and then place the following code on it:
    < b:if cond = ' data: blog. PageType.page_displayform! = & quot; item & quot; '>
    < div id = ' carousel ' >
    < div id = ' previous_button '/>
    < div class = ' container ' >
    <script>
    document.write (& quot; & amp; lt; script src = \&quot;/feeds/posts/default/-/sport? max-results = & quot; + numposts1 + & amp; quot; & orderby = published & amp; alt = json-in-script & callback = showrecentposts\&quot; & gt; & lt;/script & gt \; & quot;);
    </script>
    < div class = ' clear '/>
    </div>
    < div id = ' next_button '/>
    </div>
    < script type = ' text/javascript ' >
    (function ($) {$ (document). ready (function () {
    $ (& quot; # carousel. container & quot;). jCarouselLite ({
    auto: 4000,
    scroll: 1,
    speed: 800,
    visible: 5,
    start: 0,
    circular: true,
    btnPrev: & quot; previous_button & quot; #,
    btnNext quot;: & # next_button & quot;
        });
    })}) (jQuery)
    </script>
    </b:if>
    Note the code in red above, sport is the label that is displayed on the slider's future (remember the big small letter must be the same with the label you have created). If you want to display the latest posts or articles on a slider, just delete the code /-/sport. The above code could also put you under or above the navigation menu or You can also put above the footer.
  8. The final step, save templates and see the result. If you follow the steps above correctly, Carousel slider it would appear on your blog.
This last tutorial create automatic Carousel slider version 2, as usual if anyone is unclear please leave a message in the comment box. Good luck and hopefully useful

Thursday, November 24, 2011

Create a Widget with a single Thumbnail Label Specified

Wah the title less fit I think Yes ...? Bodo very, important contents. This time I will give one more blogger tutorial about making widgets per label with only one thumbnail at the top and below display titles only, for more details please see the screenshot image below. Usually these widgets is widely used by blog news content, one of the functions of this widget to make it easy for readers to explore each category and can also to summarise the space on a template. In fact this tutorial is long but since many are asked in the comment box or in the email, there is no harm if I clear again in this article. How to create a widget per label that I use here is really easy and only merge between tutorial create labels or categories with thumbnails and create a widget that displays only the title of the label only.

widget per label

DEMO

If you look at the template Mas Paper or Johny Portal 2, in specific parts of the template that there is a widget that displays labels with the arrangement of one title with thumbnails and summary, and below the list of the same label but only displays the title only. How to make it are as follows:
  1. First You have to do is log into your blogger account with You
  2. After that select the blog that you want to add this widget.
  3. Go to template >> Edit HTML, then tick the expand widget templates
  4. Just in case that doesn't happen error in editing later, first backup your template.
  5. After all the above steps you do, place the following code above the code ]] > </b:skin> :
    img. label_thumb {float: left; border: "1px" solid # 8f8f8f; background: # D2D0D0; margin-right: 10px; height:60px; width:60px; padding: 2px}
    . label_thumb: hover img {background: # f7f6f6}
    . label_with_thumbs {float: left; width: 100%; min-height: 70px; margin: 0 5px 2px 0}
    ul. label_with_thumbs li {min-height: 65px; margin: 0; padding: 2px 4px 0}
    Note the color Blue writing above, it is a thumbnail image width and height.
  6. Next up is still in a position to Edit HTML, insert the following code above the code </head> :
    < script type = ' text/javascript ' >
    //<![CDATA[
    function labelthumbs(json){document.write('<ul class="label_with_thumbs">');for(var i=0;i<numposts;i++){var entry=json.feed.entry[i];var posttitle=entry.title.$t;var posturl;if(i==json.feed.entry.length)break;for(var k=0;k<entry.link.length;k++){if(entry.link[k].rel=='replies'&&entry.link[k].type=='text/html'){var commenttext=entry.link[k].title;var commenturl=entry.link[k].href;}
    if(entry.link[k].rel=='alternate'){posturl=entry.link[k].href;break;}}var thumburl;try{thumburl=entry.media$thumbnail.url;}catch(error)
    {s=entry.content.$t;a=s.indexOf("<img");b=s.indexOf("src=\"",a);c=s.indexOf("\"",b+5);d=s.substr(b+5,c-b-5);if((a!=-1)&&(b!=-1)&&(c!=-1)&&(d!="")){thumburl=d;}else thumburl='https://blogger.googleusercontent.com/img/b/R29vZ2xl/AVvXsEjtksmocskCJIscQaoZ1LIQbe4oufgCzlovye0OSuo18gQXCPESU6IkhVol1jF2nA5-YPxnZZnpmLlHAUQmyfGSyT_ewcKSVh4yDiJdxUl0bxqAz0cuq_iyfaK59NQa5uirU3YJNS5djNyR/';}
    var postdate=entry.published.$t;var cdyear=postdate.substring(0,4);var cdmonth=postdate.substring(5,7);var cdday=postdate.substring(8,10);var monthnames=new Array();monthnames[1]="Jan";monthnames[2]="Feb";monthnames[3]="Mar";monthnames[4]="Apr";monthnames[5]="May";monthnames[6]="Jun";monthnames[7]="Jul";monthnames[8]="Aug";monthnames[9]="Sep";monthnames[10]="Oct";monthnames[11]="Nov";monthnames[12]="Dec";document.write('<li class="clearfix">');if(showpostthumbnails==true)
    document.write('<a href="'+posturl+'" target ="_top"><img class="label_thumb" src="'+thumburl+'"/></a>');document.write('<strong><a href="'+posturl+'" target ="_top">'+posttitle+'</a></strong><br>');if("content"in entry){var postcontent=entry.content.$t;}
    else
    if("summary"in entry){var postcontent=entry.summary.$t;}
    else var postcontent="";var re=/<\S[^>]*>/g;postcontent=postcontent.replace(re,"");if(showpostsummary==true){if(postcontent.length<numchars){document.write('');document.write(postcontent);document.write('');}
    else{document.write('');postcontent=postcontent.substring(0,numchars);var quoteEnd=postcontent.lastIndexOf(" ");postcontent=postcontent.substring(0,quoteEnd);document.write(postcontent+'...');document.write('');}}
    var towrite='';var flag=0;document.write('<br>');if(showpostdate==true){towrite=towrite+monthnames[parseInt(cdmonth,10)]+'-'+cdday+' - '+cdyear;flag=1;}
    if(showcommentnum==true)
    {if(flag==1){towrite=towrite+' | ';}
    if(commenttext=='1 Comments')commenttext='1 Comment';if(commenttext=='0 Comments')commenttext='No Comments';commenttext='<a href="'+commenturl+'" target ="_top">'+commenttext+'</a>';towrite=towrite+commenttext;flag=1;;}
    if(displaymore==true)
    {if(flag==1)towrite=towrite+' | ';towrite=towrite+'<a href="'+posturl+'" class="url" target ="_top">More »</a>';flag=1;;}
    document.write (towrite); document.write (' </li> '); if (displayseparator == true)
    if (i! = (numposts-1))
    document.write (' ');}document.write (' </ul> ');}
    //]]>
    </script>
    If the above script code is too long, you can save in the repository of Google Code , or use your own script code below that I have concisely on Google Code.
    < script src = ' https://masolis-javascript.googlecode.com/svn/trunk/label.js ' type = ' text/javascript '/>
  7. After that save templates, then proceed to select the layout you want to add this widget. Click add gadgets >> HTML/Javascript code to the following maximum:
    < script type = "text/javascript" > var numposts = 1; var showpostthumbnails = true; var displaymore = false; var displayseparator = false; var showcommentnum = false; var showpostdate = false; var showpostsummary = true; var numchars = 60; </script>

    < script type = "text/javascript" src = "/feeds/posts/default/-/news? orderby = updated & alt = json-in-script & callback = labelthumbs" > </script>

    < script type = "text/javascript" >
    function recentpostslist (json) {
    document.write (' <ul> ');
    for (var i = 1; i < json. feed. entry. length; i ++)
     {
    for (var j = 1; j < json.feed.entry [i]. j++ link s.length;) {
    if (json.feed.entry [i] [j] link. = ' rel = alternate ') {
    break;
          }
        }
    var entryUrl = "'" + json.feed.entry [i] [j]. link href + "'";//bs
    var entryTitle = json.feed.entry [i]. title. $ t;
    var item = "<li>" + "< a href =" + entryUrl + "" target = "_blank" > ' + </a> + "entryTitle </li>";
    document.write (item);
     }
    document.write (' </ul> ');
     }
    </script>
    < script src = "http://johnyportal2.blogspot.com/feeds/posts/summary/-/news? max-results = 6 & alt = json-in-script & callback = recentpostslist" > </script>
    < a href = "http://johnyportal2.blogspot.com/search/label/news" style = "float: right; font: normal an 11px Arial; padding: 5px 0;"> More on this category & # 187; </a>
    Description:
    The color Blue : is a category label or ditampikan, you can replace it with a label you customize to your needs.
    The color Red : replace the URL with the URL of your blog.

    Then save and see the result.
The look of this widget to follow the CSS code to the sidebar (if you put in the sidebar) on which template you use. The CSS code used in the making of this widget is used only to manage the display of thumbnails.

This last tutorial about creating widgets per jadul label this time, if there is something unclear please leave a message in the comment box, good luck and may be useful.

Wednesday, November 16, 2011

Make Automatic Image Slider

Exspost Blog - This answers the question of utorial friend debbie irlando manurung aka Zondim, asking to be made a slider tutorial on Johnny Handsome Banget. The Template that is used on a blog that I'll share later, only now more hectic mass nguli so that later when it's spare time aja. There are some templates that will be my share but this time I've made simple, with minimal use of javascript, yes that is definitely more lightly than usual. Okay back to the tutorials which I will make, this time I will discuss about how to create a simple automatic image slider that will display your latest post.

image slider otomatis

DEMO

This Slider only wear innerfade jquery and jquery cycle plugin to transfer content slider softens (bener not ya ...?), understanding jquery Innerfade roughly like this:
InnerFade is a small plugin for the jQuery-JavaScript-Library. It's designed to fade you any element inside a container in and out.

These elements could be anything you want, e.g. images, list-items, divs. Simply produce your own slideshow for your portfolio or advertisings. Create a newsticker or do an animation.
Wah even confused myself I mas/mbak knowing I can 6 United Kingdom first time school, just go on the way of its production:
  1. Login to blogger with your account
  2. After that select the blog that you want to add this slider.
  3. Go to template >> Edit HTML, then tick the expand widget templates
  4. Just in case if an error in editing later, you should backup your template first.
  5. After all the above steps you do, place the following code above the code ]] > </b:skin> :
    # featuredSlider {background: # eee; float: left; margin: 0; padding: 0 0 10px; width:640px; position: relative; color: # 666; border-bottom: solid # c3c3c3 "1px"}
    # featuredSlider. featured-thumb {float: left; margin: 10px; padding: 0px;}
    # container {featuredSlider. height:226px; margin: 0 10px 0 0; overflow: hidden; position: relative;}
    . featuredTitle {padding-top: 10px; font: 16px Oswald; text-shadow: "1px" "1px" # ccc "1px";}
    . featuredTitle a {color: # f7441a}
    . featuredTitle a:hover{color: # 000}
    . navigation {position: relative; bottom: 23px; float: right; overflow: hidden;}
    ul. pagination {list-style-type: none; margin: 0 auto; padding: 0;}
    ul. pagination a {float: left; margin: 0 5px; display: inline; }
    ul. pagination a {display: block; width: 12px; padding-top: 12px; height: 0; overflow: hidden; background-image: url (https://blogger.googleusercontent.com/img/b/R29vZ2xl/AVvXsEir1bsUIqtlc4ahgqEkoyqEDv41aUkKiUo_0WFZpN-sFb88p_PeUHWVllpsAbkRA5r0WOoOFWqahxcfHOnqiwdedsoFDhhG5wfzuLvivcy9SDK9gbizOalRu8mo52t6FpoiyeClL6GpDVI/s1600/slider+pagination.png); background-position: 0 0; background-repeat: no-repeat; }
    ul. pagination a:hover {background-position: 0-12px;}
    ul. pagination a:hover {background-position: 0-12px;}
    ul. pagination a. activeSlide {background-position: 0-12px}
    a. readmore {float: left; border: solid # 444 "1px"; background: # 585858 url (https://blogger.googleusercontent.com/img/b/R29vZ2xl/AVvXsEiU1souyceHUJKmhmOBnlaA0D5N8o0gRgeAYT9nAcVsd-8IAXNlLR1frZU5eVGWQpliJCBQ-iJkPmc02AdLclx1FzZarBUE3pH-QO3QY0wzOtULH3u8VAoaCHo38efj95eWaGzlPdKVQRE/s1600/fade.png) repeat-x top; display: block;;font: bold 12px Arial; text-shadow: "1px"-0-"1px" # 333; margin: 10px 0 0 0; padding: 4px 10px; color: # eee;-webkit-border-radius: 3px;-moz-border-radius: 3px;
    border-radius: 3px;-webkit-box-shadow: 0px 0px "1px" "1px" rgba (0, 0, 0, 0.5);-moz-box-shadow: 0px 0px "1px" "1px" rgba (0, 0, 0, 0.5); box-shadow: 0px 0px "1px" "1px" rgba (0, 0, 0, 0.5);}
    a. readmore: hover {color: # ff0}
    Take note of the color code Blue , it is the width and height sliders on the demo I've made, please adjust the size of your template.
  6. The next step is still in a position to Edit HTML, insert the following code above the code </head> :
    < script src = 'http://ajax.googleapis.com/ajax/libs/jquery/1.7.2/jquery.min.js' type = ' text/javascript '/>
    <script src='https://masolis-javascript.googlecode.com/svn/trunk/jquery.innerfade.js' type='text/javascript'/>
    <script src='https://masolis-javascript.googlecode.com/svn/trunk/cycle.js' type='text/javascript'/>
    <script type='text/javascript'>
    //<![CDATA[
    imgr = new Array();
    imgr[0] = "https://blogger.googleusercontent.com/img/b/R29vZ2xl/AVvXsEhOrY7GGrFKMuSnnpoMrbu8dU8I_V0kExL-LsKta6GeluJV1dZjO8BNM6Wuquhd6tesw5jPwdVNIw_LPJByUCvBi2zoYyR5q7eP43JkoCSpk3Efik4oBld1x1iqhhHCiu7Gh-EauHlXis8/s1600/no+image.jpg";
    showRandomImg = true;
    aBold = true;
    summaryPost = 150;
    summaryTitle = 25;
    numposts = 7;

    function removeHtmlTag(strx,chop){var s=strx.split("<");for(var i=0;i<s.length;i++){if(s[i].indexOf(">")!=-1){s[i]=s[i].substring(s[i].indexOf(">")+1,s[i].length)}}s=s.join("");s=s.substring(0,chop-1);return s}

    function showrecentposts(json) {
    j = (showRandomImg) ? Math.floor((imgr.length+1)*Math.random()) : 0;
    img = new Array();
    document.write('<div class="slides">')
    if (numposts <= json.feed.entry.length) {
    maxpost = numposts;
    }
    else
           {
    maxpost=json.feed.entry.length;
      }
      for (var i = 0; i < maxpost; i++) {
        var entry = json.feed.entry[i];
        var posttitle = entry.title.$t;
    var pcm;
        var posturl;
        if (i == json.feed.entry.length) break;
        for (var k = 0; k < entry.link.length; k++) {
          if (entry.link[k].rel == 'alternate') {
            posturl = entry.link[k].href;
            break;
          }
        }

    for (var k = 0; k < entry.link.length; k++) {
          if (entry.link[k].rel == 'replies' && entry.link[k].type == 'text/html') {
            pcm = entry.link[k].title.split(" ")[0];
            break;
          }
        }

        if ("content" in entry) {
          var postcontent = entry.content.$t;}
        else
        if ("summary" in entry) {
          var postcontent = entry.summary.$t;}
        else var postcontent = "";
       
        postdate = entry.published.$t;

    if(j>imgr.length-1) j=0;
    img[i] = imgr[j];

    s = postcontent ; a = s.indexOf("<img"); b = s.indexOf("src=\"",a); c = s.indexOf("\"",b+5); d = s.substr(b+5,c-b-5);

    if((a!=-1)&&(b!=-1)&&(c!=-1)&&(d!="")) img[i] = d;

    //cmtext = (text != 'no') ? '<i><font color="'+acolor+'">('+pcm+' '+text+')</font></i>' : '';


    var month = [1,2,3,4,5,6,7,8,9,10,11,12];
    var month2 = ["Jan","Feb","Mar","Apr","May","Jun","Jul","Aug","Sep","Oct","Nov","Dec"];

    var day = postdate.split("-")[2].substring(0,2);
    var m = postdate.split("-")[1];
    var y = postdate.split("-")[0];

    for(var u2=0;u2<month.length;u2++){
    if(parseInt(m)==month[u2]) {
    m = month2[u2] ; break;
    }
    }

    var trtd = '<div><p class="featured-thumb"><a href="'+posturl+'"><img width="340" height="212" src="'+img[i]+'"/></a></p><div class="featuredTitle"><a href="'+posturl+'">'+posttitle+'</a></div><p>'+removeHtmlTag(postcontent,summaryPost)+'... </p><a href="'+posturl+'" class="readmore">Read more &#187;</a></div>';
    document.write(trtd);


    j++;
    }
    document.write('</div>')
    }

    //]]>
    </script>
    Description:
    Note the URL of the script color Red above, it is the script code jQuery.min.js recent series that I used to create this slider. If You are already on the template, there is aQuery.min.js even though the series is different, the code in red above, You no longer need to enter. Pretty one jQuery.min.js is on the template, it's up to how many series, if you can the latest version.
    Color code Blue : 7 is the amount slider is displayed. While the number 340 and 212 is a long and wide image that exists in the slider.
  7. The next step is to call the slider that appears in our blog. Search code < div id = ' main ' wrapper->, and then place the following code below:
    < b:if cond = ' data: blog. PageType.page_displayform! = & quot; item & quot; '>
    < div id = ' featuredSlider ' >
    < div class = ' container ' >
    <script>
    document.write (& quot; & amp; lt; script src = \&quot;/feeds/posts/default/-/sport? max-results = & quot; + & quot; numposts + & amp; orderby = published & amp; alt = json-in-script & callback = showrecentposts\&quot; & gt; & lt;/script & gt \; & quot;);
    </script>
    < div class = ' navigation ' >
    < ul class = ' pagination '/> <script>
    $ (& # 39;.slides & # 39 cycle ({;).
    fx: & # 39 & # 39; fade;
    speed: slow & # 39 & # 39;;;
    timeout: 3000,
    pager: & # 39;.pagination & # 39;
    });
    </script>
    </div> </div> <!--end. container-->
    </div>
    </b:if>
    If you want to display the slider per category or label stayed just above code is added:
    /feeds/posts/default? max-results
    Into:
    /feeds/posts/default/-/your label? max-results
    Please replace "your label" with the category that you want to display on the slider.
  8. Lastly, save templates and see the result.
That last image Slider tutorial create automatic joss really existed at Johnny Handsome Banget, if still unclear please leave a message in the comment box. Congratulations Suhoor and hopefully useful.


Copyright @ 2013 Exspost News.

Designed by Templateify & Sponsored By Twigplay